 |  |  |  |
|---|---|---|---|
 |  |  |  |
 |  |  |  |
 |  |  |  |
 |  |  |  |
 |  |  |  |
Click on a picture in the gallery above to see a full resolution image, or to navigate manually
Sud-Aviation SE-210 Caravelle 10R
Hispania Líneas Aéreas
Somewhere in Europe, 1983
Why this plane?
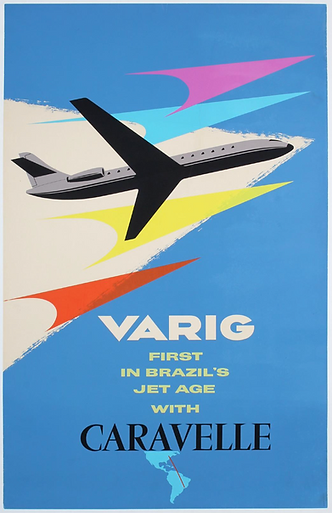
Apparently the Caravelle was the first airplane I learned the name of, as a young boy. In the early 1970s Brazilian airlines like VARIG and Cruzeiro do Sul (both now defunct) marketed flying in the Caravelle as the pinnacle of comfort and sophistication. The beautiful, clean lines and the publicity shots of the cabin were quite in contrast with the planes I actually got to fly on at the time, following my parents to various posts around the country (mostly Beechcraft C-45s and Douglas DC-3s). Looking for a quick build of my first civilian plane, this elegant first-generation jet airliner was a natural choice.
What was added (or changed)
The Amodel kit comes with everything needed to complete a decent model of the Caravelle, including a small photoetch sheet for the wing fences and paint masks, so changes were minimal.
-
The blade antenna provided for the lower starboard fuselage did not match my reference material, so I had it cut to a more accurate shape. Reference photos of my plane also showed a blade antenna on top of the fuselage, which was cut from spare bits of the photoetch sheet.
-
The kit does not represent the wingtip navigation lights, so I made an effort to include these, made from spare photoetch and Micro Krystal Klear.
-
I added window decals from Authentic Airliners. The kit comes with simple (all black) but perfectly decent window decals. I got these just because they looked fun.
-
Having decided to represent the plane in flight, I procured a stand with a wide base, made by Academy.
Notes and lessons learned...
This is a short run kit made by a small company in Ukraine. The instructions even proudly advertise this fact. Therefore, you don't start a project like this expecting modern Tamiya precision; you start it because you want to tackle a relatively niche subject, and because we thankfully have companies that take the risk of making kits for these. You get exactly what you signed up for: no alignment pins, significant gaps to fill, flash, and some parts that are slightly malformed and needed re-sculpting. As expected, "intended only for experienced modelers".
So no point in complaining. Instead, let's concentrate on the positives, the main one being that the final product looks like a Caravelle. In addition, the decals were a delightful surprise. Sharply printed, opaque, good density, and played well with Microsoft and Microsol. The kit comes with 2 options of markings, the Hispania one I chose to use, and another for Air Caledonie. Out of caution, based on previous experiences with European short run kits (looking at you, Roden) I chose to mask and airbrush the yellow and red lines along the fuselage instead of using the kit-provided decals. In retrospect, this was probably not necessary.
-
The kit comes with the passenger windows softly marked on clear parts. In theory, you are given the choice of having the windows covered by masks provided with the kit, so they stay clear. But this proved too difficult. First, you have to deal with big gaps between the clear strips and the rest of the fuselage, which means that by the time you have done the filling and sanding, the window markings are gone. Second, a bit strangely, there are fewer masks in the sheet provided in the kit than the correct number of windows. I persevered, cutting extra masks from adhesive paper to make up for the missing ones (see below, construction photos). But, in the end, this proved too much work. In retrospect, the window decals were the right way to go.
-
Priming was done with SMS surfacer white (PLP03), after which the top half of the fuselage and vertical stabiliser were coated with SMS insignia white (PL72) and, to add a subtle variation in some panels, Mr Color Character white (C107). Between layers of paint a fine pacer was run along panel lines to give a subtle suggestion.
-
After that there was a lot of complex masking to be done. First, masking off the white areas, the bottom of the plane was painted with SMS PL89 (Pale Blue Grey). Then the grey was also masked, to give way to the metallic portions of the wings and wing roots. These were also done with SMS paints. First overall Jet Black (PL30). Different panels had top coats of super silver (PMT04), aluminium (PMT09) or stainless steel (PMT05). That involved some tricky "progressive masking", but working with SMS has cured my previous phobia of masking metallic stuff. I simply sprayed one metallic on tp of the previous one.
-
The wingtips and details of the wing fences were painted by hand with Gunze insignia red (H327), and the nose with Tamiya enamel X-1.
-
Then it was time to tackle the long red and yellow stripes along the fuselage. Everything else was masked off, just leaving the combined stripe. At this stage, I had already given up on the masked windows, so these were painted over. First this was covered with a half and half mix of Mr. Color 58 (orange yellow) and 329 (Yellow FS13538), which I felt matched visually my reference picture. Then the upper half was masked, and the bottom was done with SMS insignia red (PL70).
-
Finally, SMS clear gloss everywhere (PL09), followed by decals, followed by more PL09.
Click on a picture to see a full resolution image, or to navigate manually
In summary...
This project was a nice combination of a straightforward build of a kit with few parts, and just enough challenge to keep it interesting. If I had to do it again I would simply ignore the window masks, and perhaps try to use the kit decals for the red and yellow stripes, for extra simplicity.
Recommended for fans of early jet airliners.
Click on a picture to see a full resolution image, or to navigate manually


Construction images

Not a lot of plastic...

Everything else that comes with the kit

Another view of the stage following application of SMS white surfacer
Not a lot of plastic...
Click on a picture in the gallery above to see a full resolution image, or to navigate manually
This was a quick build, so not a lot of intermediate pictures to be seen...


Joining my collection of 1/144 Ukrainian kits
(Sharing the shelf with the Privateer, which is a Matchbox 1/72)